Repository
1. Preparation
-
Go to GitHub and create a new repository
| we are using Sourctree by Atlassian in this guide. |
-
Open Source Tree
press File → Clone
enter your git repository path
select a target directory
and press Clone.
| dont forget to Push the changes you have made |
2. Creating the Structure
Open your cloned folder with VS Code and create the folder structure and files for Antora.
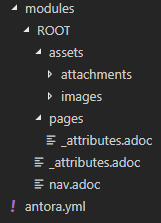
| see Antora Structure Docs for more |
3. Creating the Content
3.1. Attributes
to register your modules add the following content to
modules/ROOT/pages/_attributes.adoc in your repository folder and add

modules/ROOT/_attributes.adoc in your repository folder and add

| see Antora Modules Docs for more |
3.2. Standard Page
Antora uses the AsciiDoc files you have stored in your Repository to build the docs. Therefore it would be advisable to have a look at the AsciiDoc Writers Guide and AsciiDoc Cheatsheet .
-
Create a new .adoc file in your pages module
-
Add the title of the page on the first line
-
On the second and following lines add your metadata and attributes
-
Seperate the from the body block by at least one blank line
-
Write your content
| The name you use when saving the file will be used to compute the page´s URL. |
KEY POINTS TO REMEMBER
-
The file must be saved in the pages directory of a module.
-
The file must be saved with the extension .adoc.
-
The file must be marked up with valid AsciiDoc.
-
The file must have a page title.
Getting Started Page from the OpenEMS Docs :
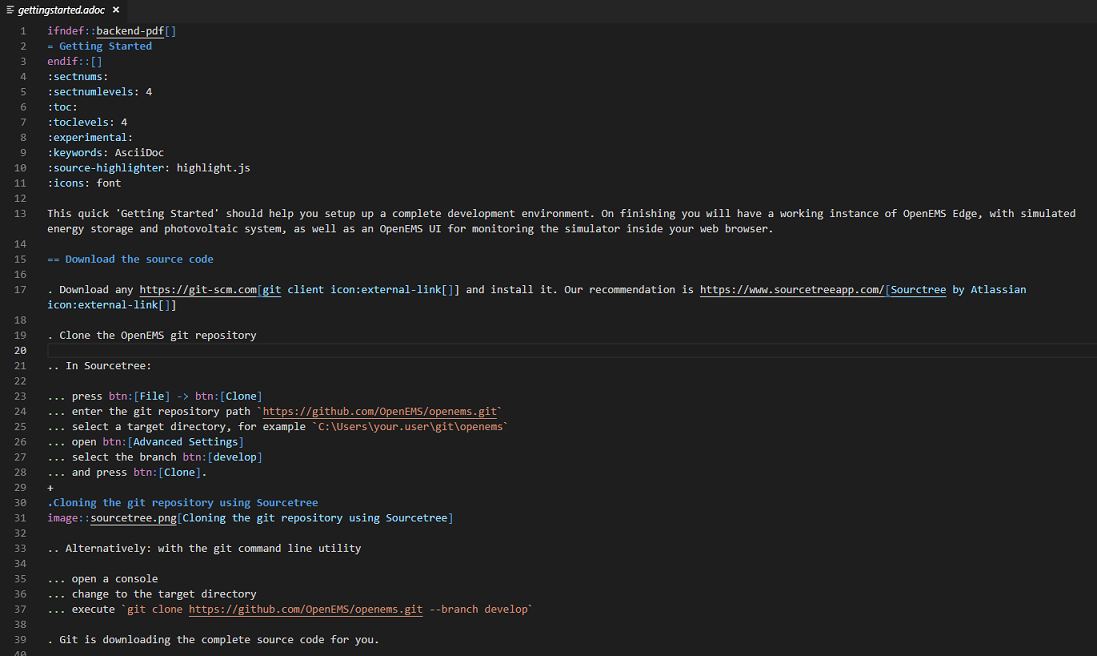
| see Antora Page Docs for more |
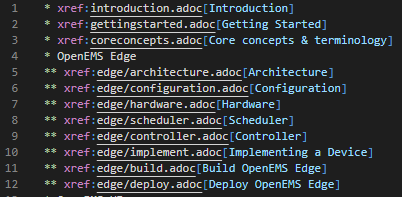
4. Navigation File
The Navigation File (modules/ROOT/nav.adoc) is responsible to set your Navigation Component on your Homepage.
Example from OpenEMS:
nav.adoc
Navigation Component
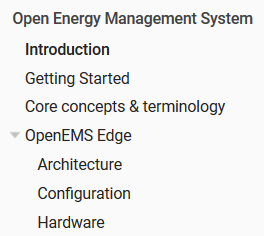
You can create Single or Multi lists .
| see Antora Navigation Docs for more |
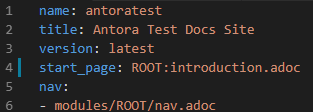
5. antora.yml
Our Playbook Project will call antora.yml for the necessary information to fetch the .adoc files and build the html page.
KEY POINTS TO REMEMBER
The file hast to:
-
be located at the root of the documentation component.
-
be named antora.yml
-
be written in YAML
-
contain the required keys and values.
Fill your antora.yml with the required keys and values !
This is the antora.yml of the Repository we are on:
⇒ next: Create Playbook Project